Step 1:
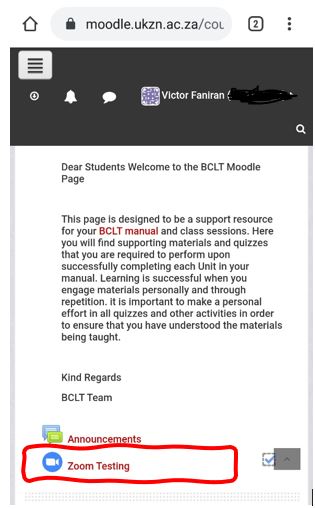
- To join a Zoom session from Moodle, Login into Moodle using your student number and password.
Step 2:
- Click My Courses (Top Left), Select the Course you wish to join its Zoom session.


1 – The Microphone button – Click to Mute or Unmute. When you see this icon ![]() it means your voice and any other sounds around you can be heard by everyone in the Zoom session. When you see this icon
it means your voice and any other sounds around you can be heard by everyone in the Zoom session. When you see this icon ![]() it means your voice and other sounds cannot be heard.
it means your voice and other sounds cannot be heard.
2 – The Video button – Click to Start or Stop your video. When you see this icon ![]()
 it means your video is off and no one can see you. When you see this icon
 ![]()
 it means your video is on and everyone in the Zoom session can see you.
3 – The Share Screen button – is used to share your screen, files or application in the Zoom session. However, this feature may be disabled by your lecturer (or host).
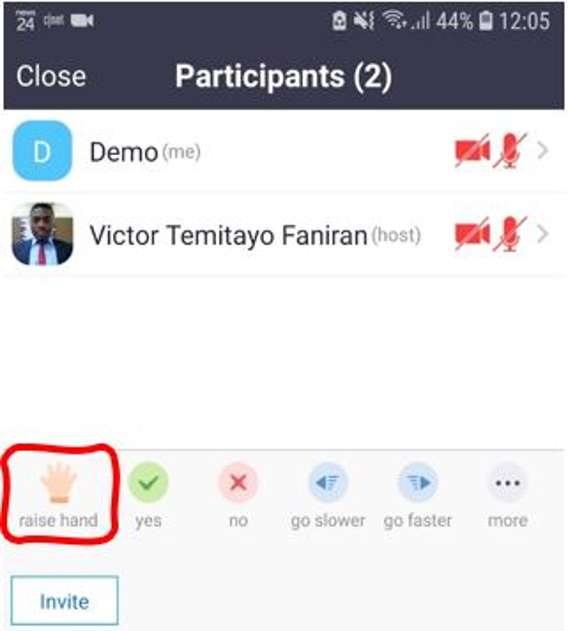
4 – The Participants button – This enables you to view all the people present in the Zoom session. It also contains icons that allow you to notify the lecturer e.g. yes, no, go slower, go faster, away, clap, raise hand (this notifies the lecturer that your hand is raised which may signify that you want to ask or answer a question).